Cryptoflex Club · Site Owner Guide
How to add and edit content on cryptoflex.club
A short, practical walkthrough of the admin. Aimed at site owners and editors. No code involved.
1. Logging in
The admin lives at one URL — bookmark it:
https://cryptoflex.club/_emdash/admin
You'll see a sign-in screen offering two options:
- Sign in with Passkey — your fingerprint, Face ID, security key, or PIN. This is the recommended way and the fastest after the first time.
- Sign in with email link — enter your email, click the link in your inbox. Use this on a new device, or if your passkey is unavailable.
2. The dashboard
Once you're in, this is the home screen.
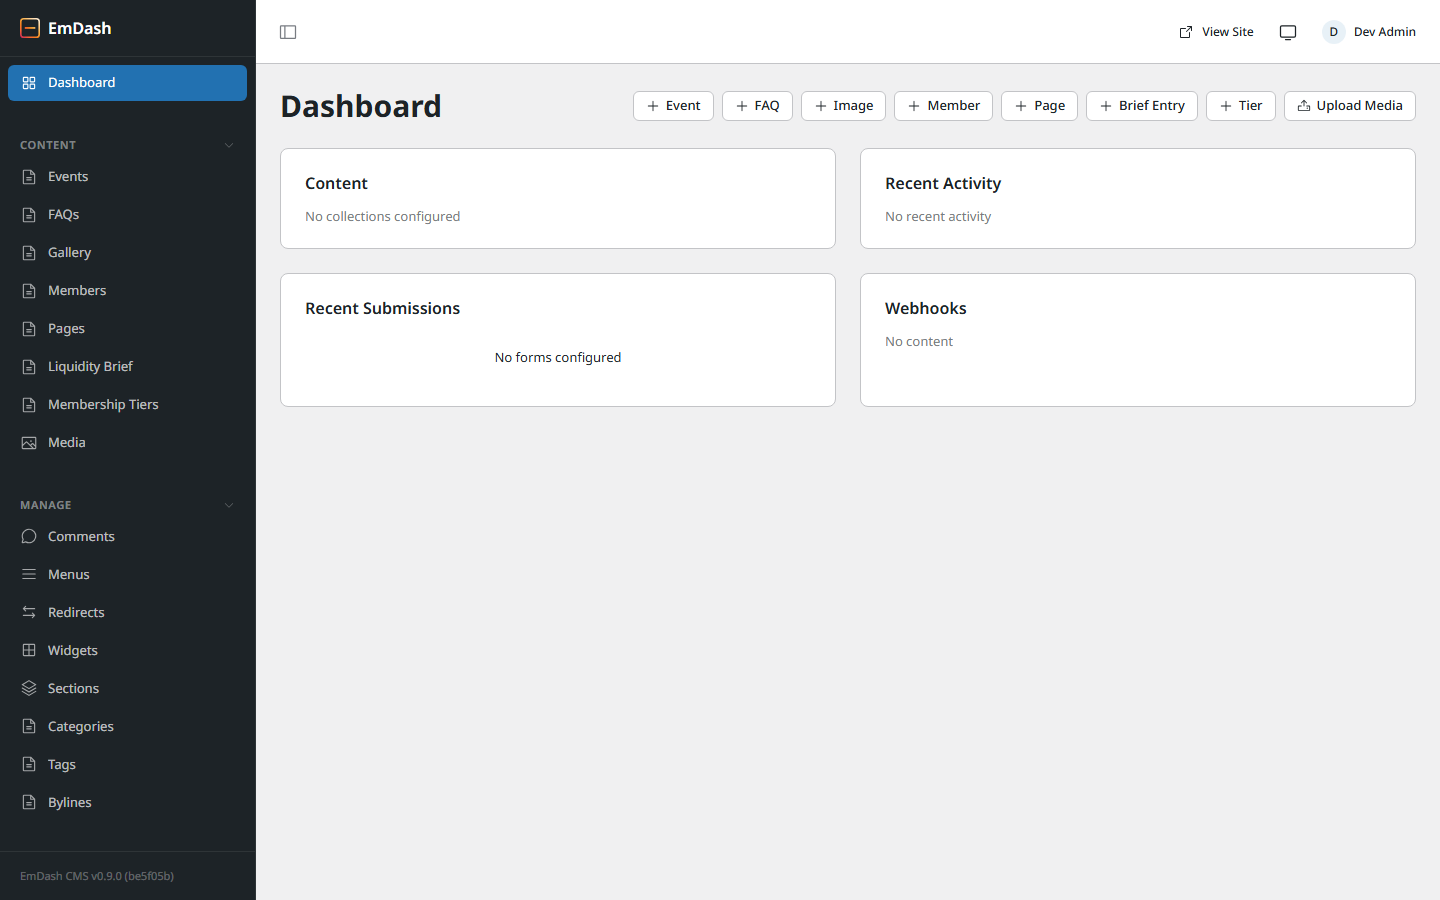
Two important regions:
- The sidebar — every type of content you can edit. Under Content: Events, FAQs, Gallery, Members, Pages, Liquidity Brief (the blog), Membership Tiers, and Media. Under Manage: Comments, Menus, Redirects, Categories, Tags, Bylines.
- The quick-create chips at the top right — one click to start a new Event, FAQ, Image, Member, Page, Brief Entry, Tier, or Media upload.
Top-right corner has View Site (opens cryptoflex.club in a new tab so you can compare what's live) and your account avatar.
3. Editing an existing post
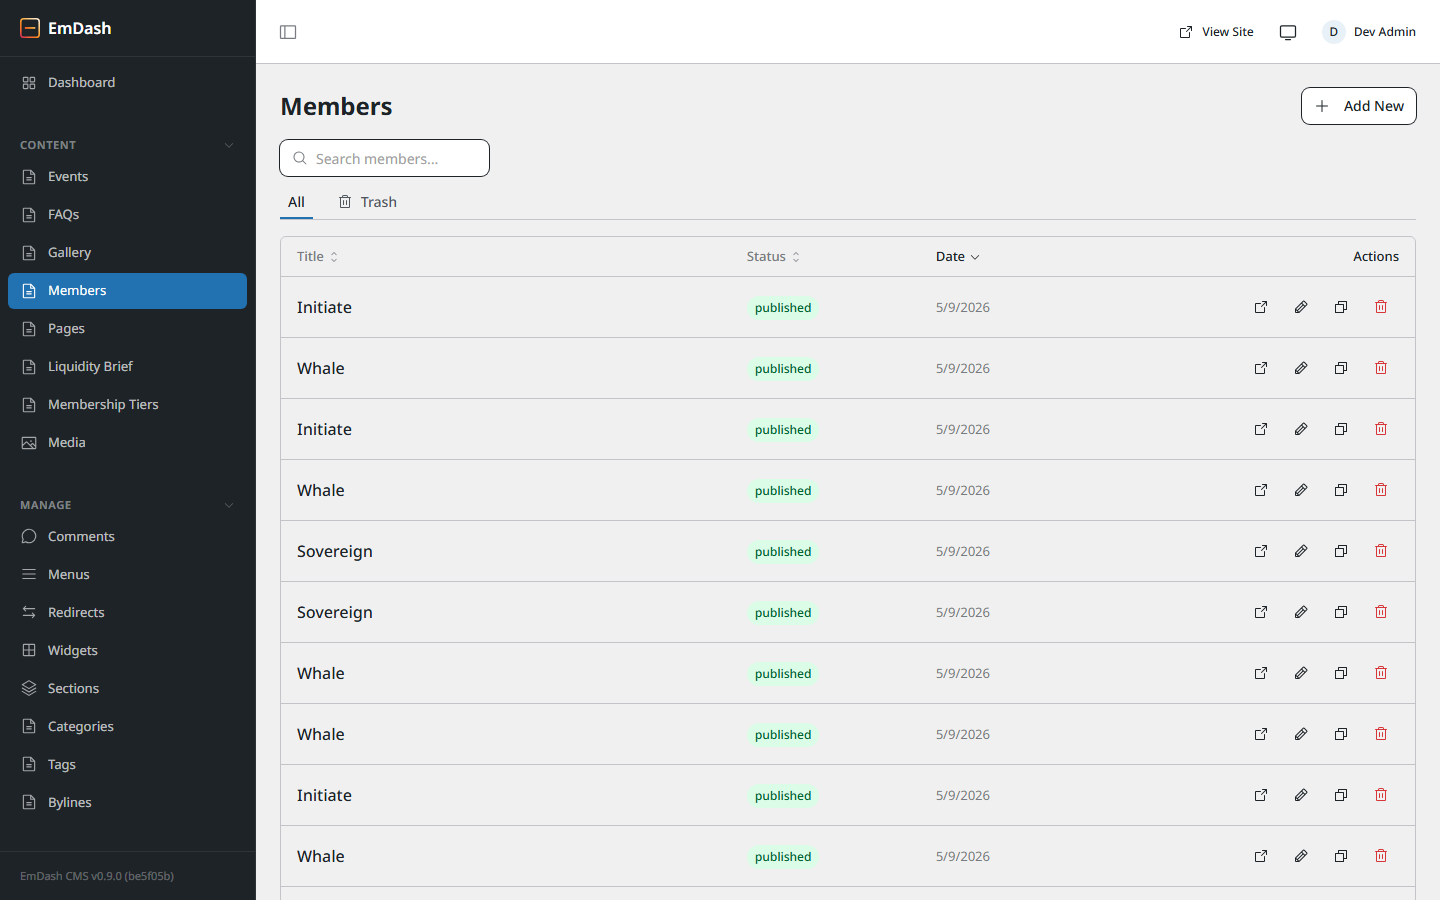
The blog is called Liquidity Brief in the sidebar. Click it. You'll see a list of every post.
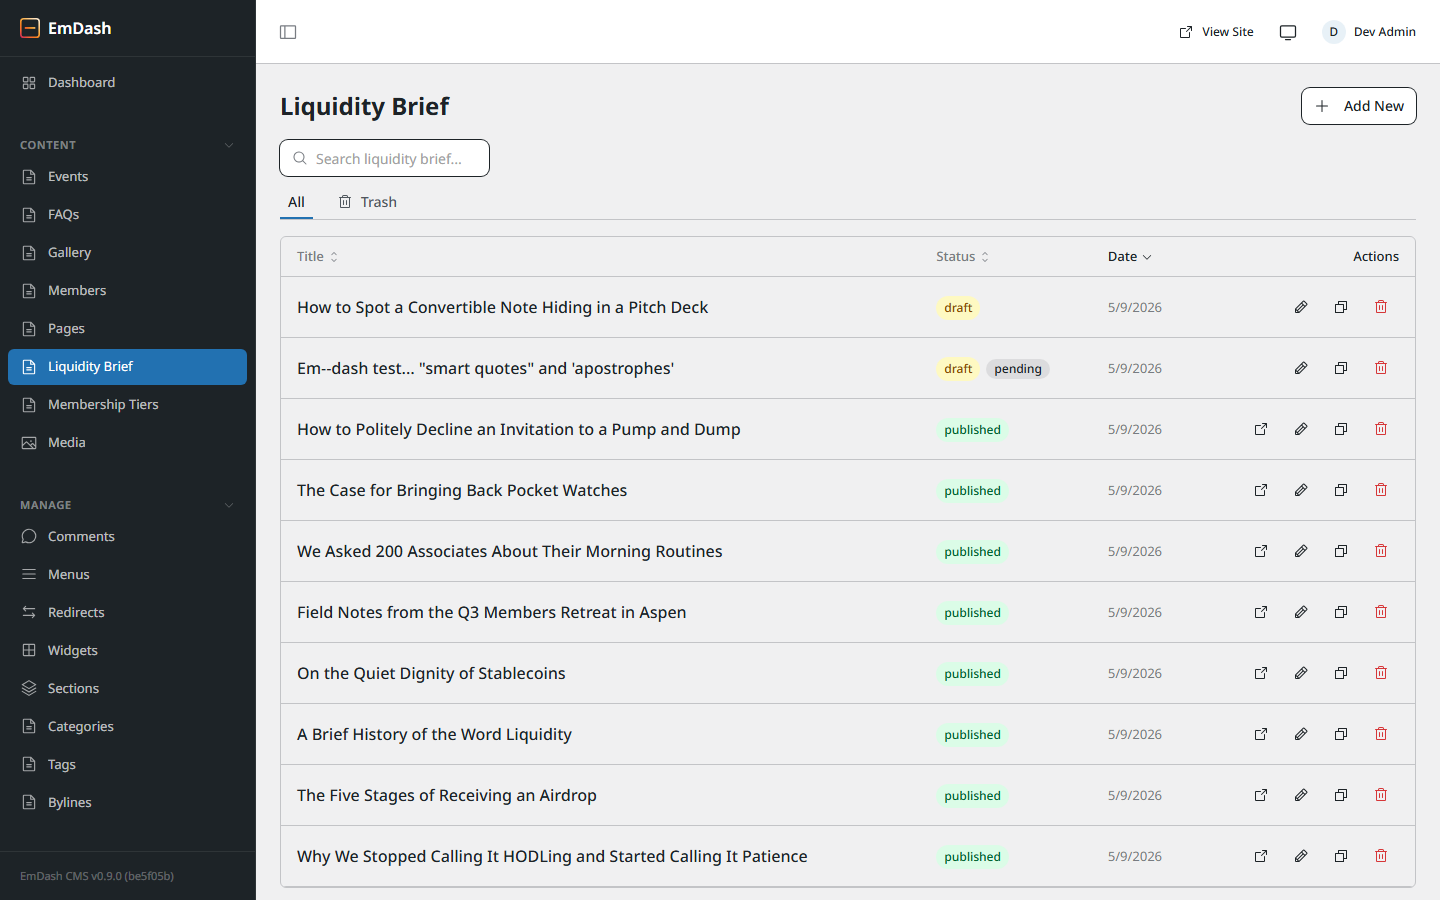
Each row shows the title, status (draft, published, etc.), date, and four icon actions on the right: view live, edit, duplicate, move to trash.
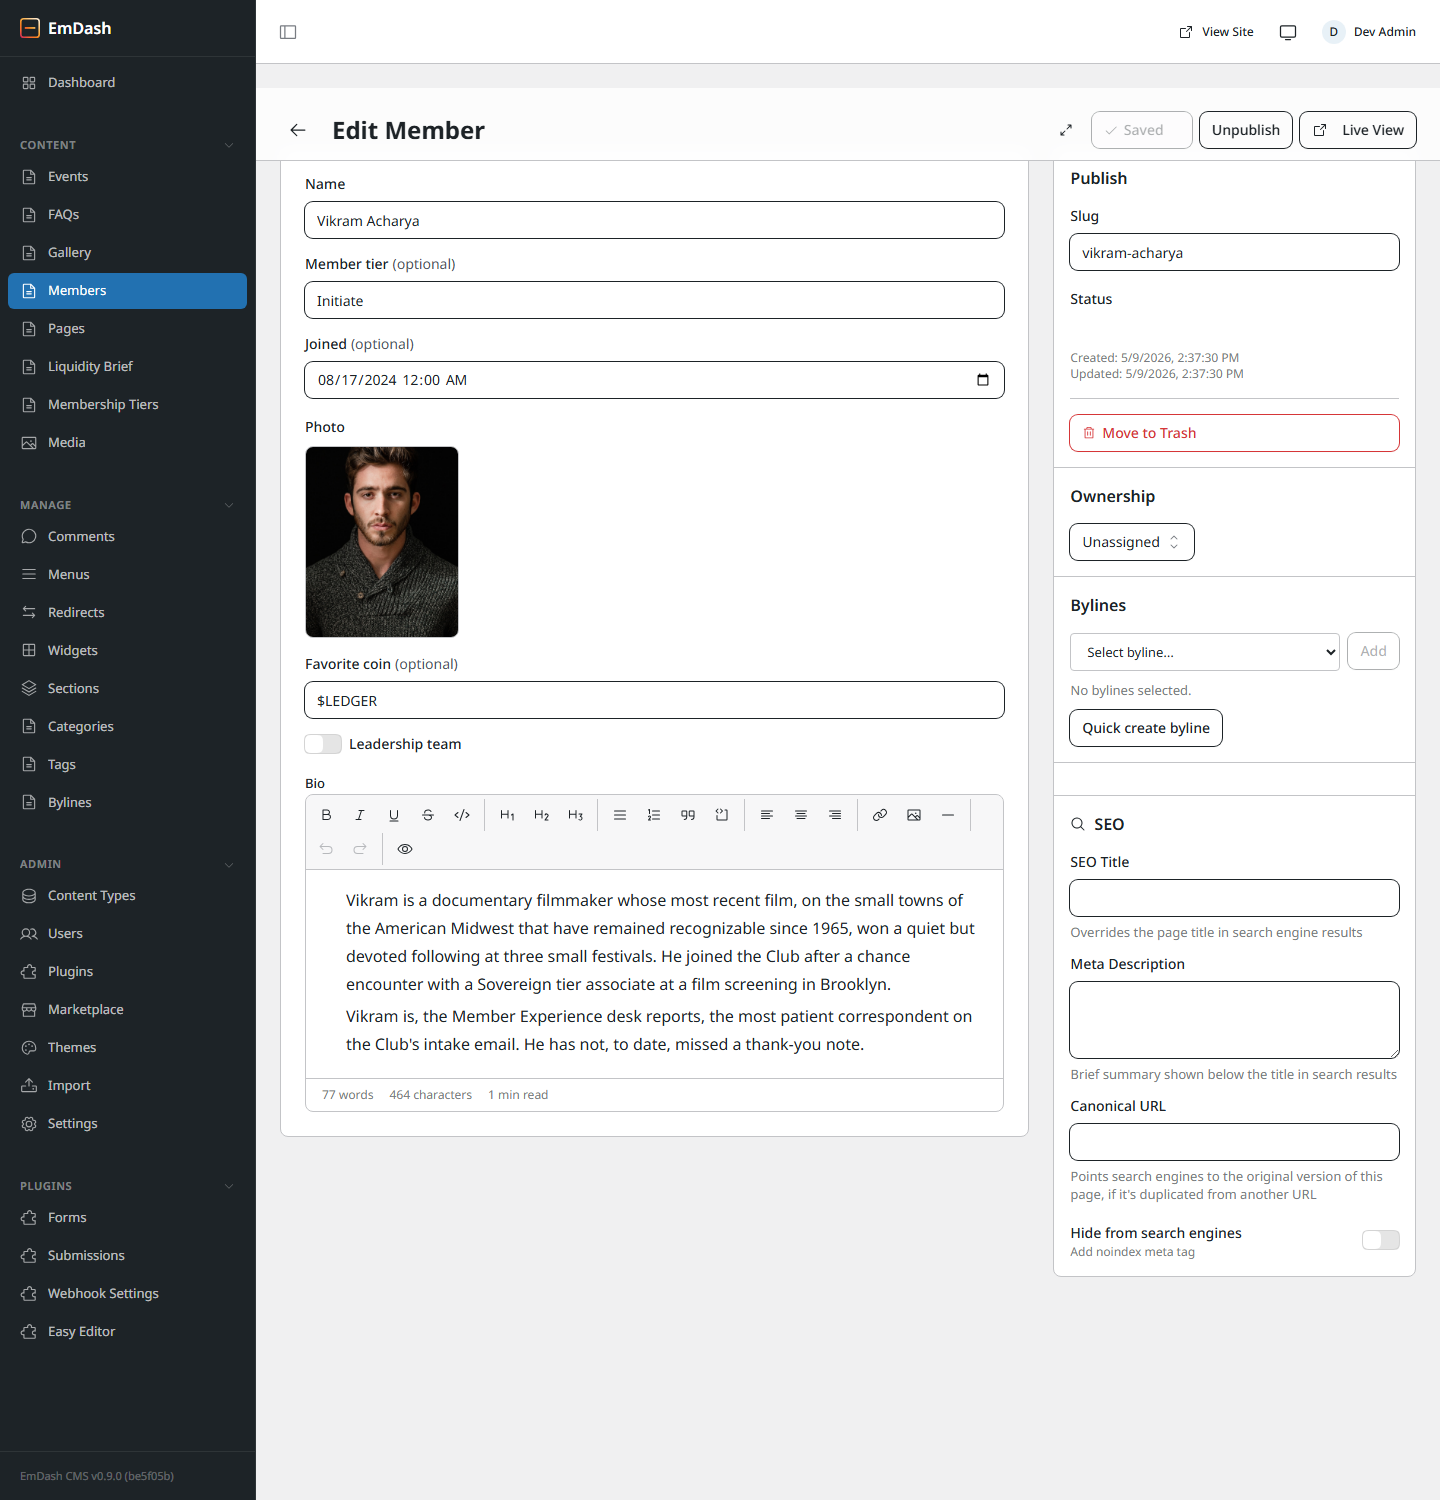
Click a title (or the pencil icon) to open the editor.
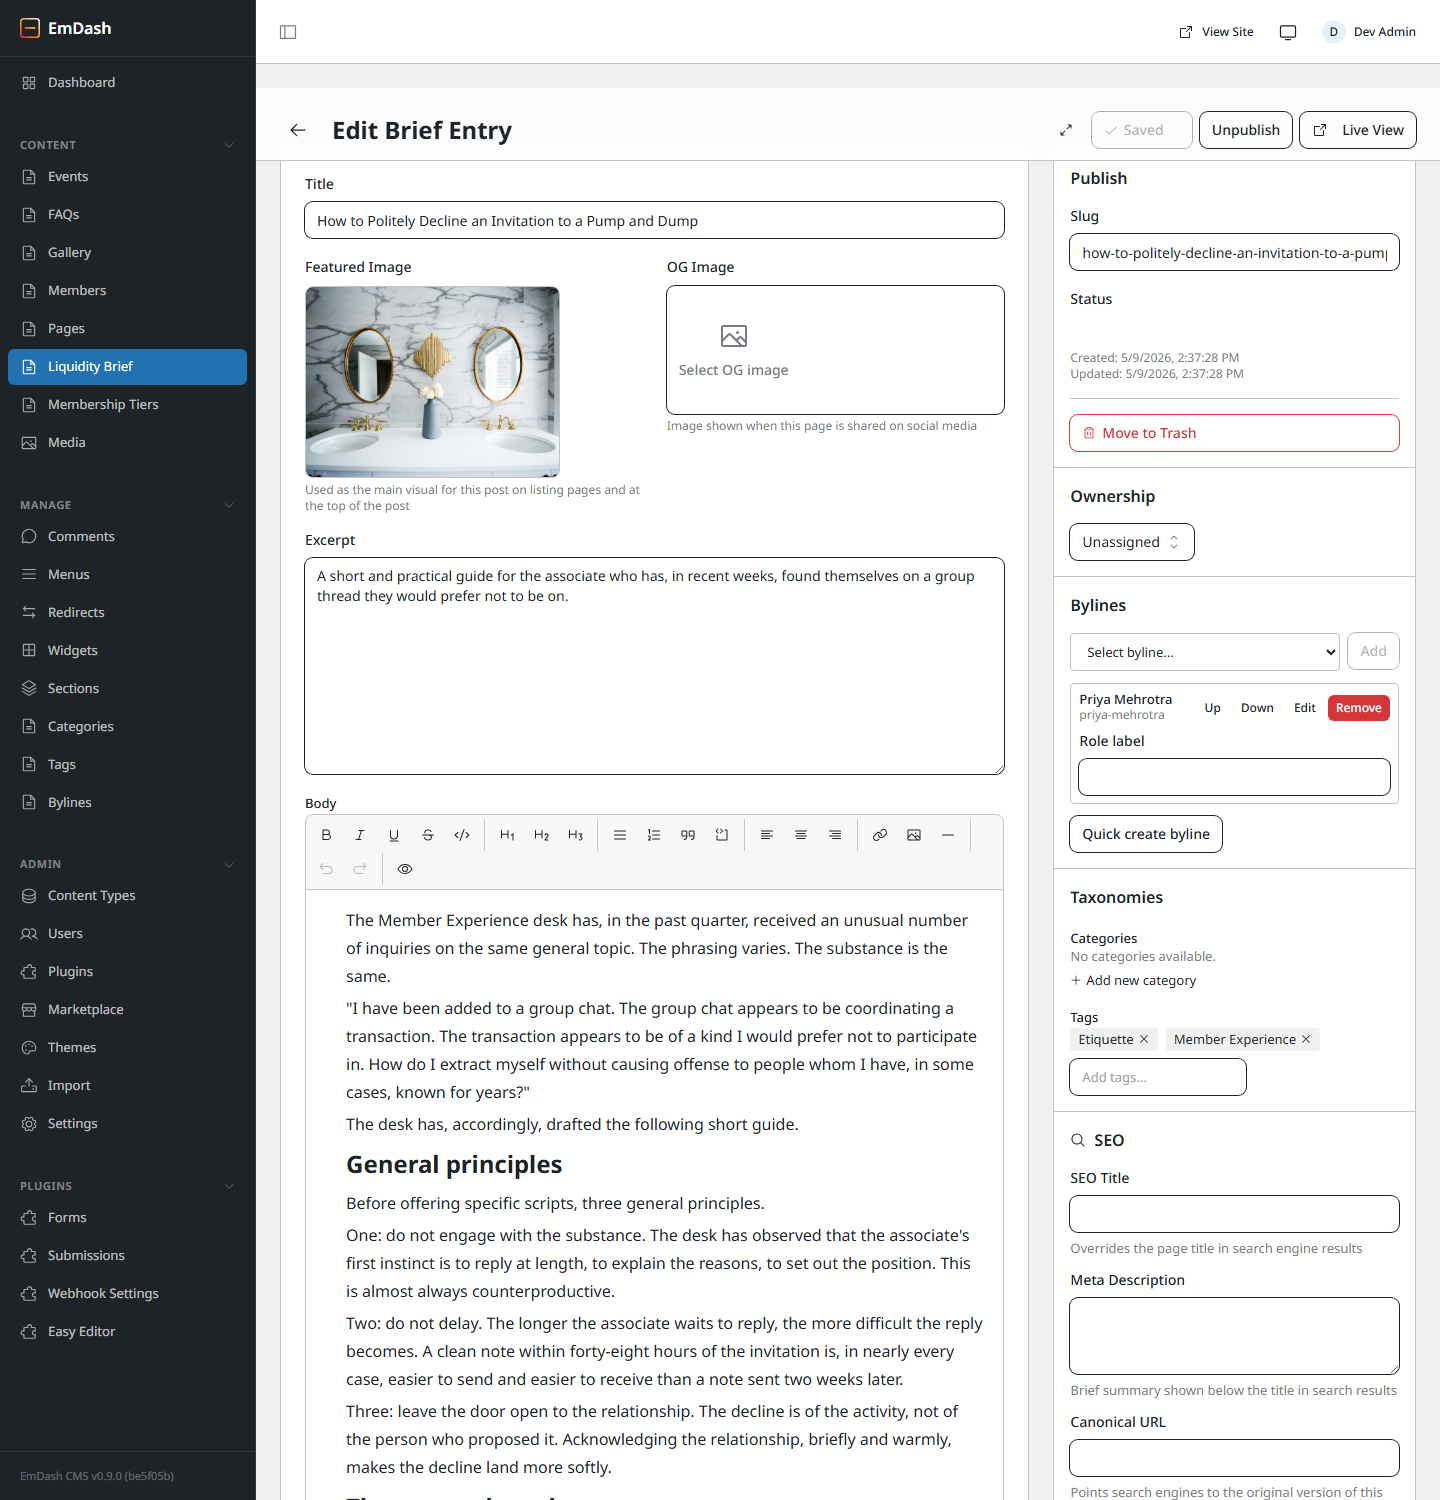
Main fields, top to bottom:
- Title — what readers see at the top of the post and on listing pages.
- Featured Image — the main visual. Used on listing cards and at the top of the post.
- OG Image — what shows up when someone shares the post on social media. Optional; if blank, Featured Image is used.
- Excerpt — one to three sentences. Used in previews and search results.
- Body — the main post. Rich text with a toolbar for bold, italic, headings (H1, H2, H3), bullet/numbered lists, quotes, code, links, and inline images.
The right rail has settings:
Publish
Status, schedule for later, move to trash.
Ownership
Which user owns this post (used for permissions).
Bylines
Author credit shown on the public post — can differ from owner.
Taxonomies
Categories and tags. Pick or type new ones.
SEO
Custom meta title, description, canonical URL, and noindex switch.
Outline / Revisions
Jump between headings; see version history and roll back.
4. Creating a new post
- From the dashboard, click + Brief Entry in the top right (or in the sidebar: Liquidity Brief → Add New).
- Fill in the Title. The URL slug auto-generates as you type — you can override it in the right rail.
- Add an Excerpt (one or two sentences).
- Write the Body. Use the toolbar for formatting.
- Click Save in the top-right. You're now in normal edit mode (autosave on).
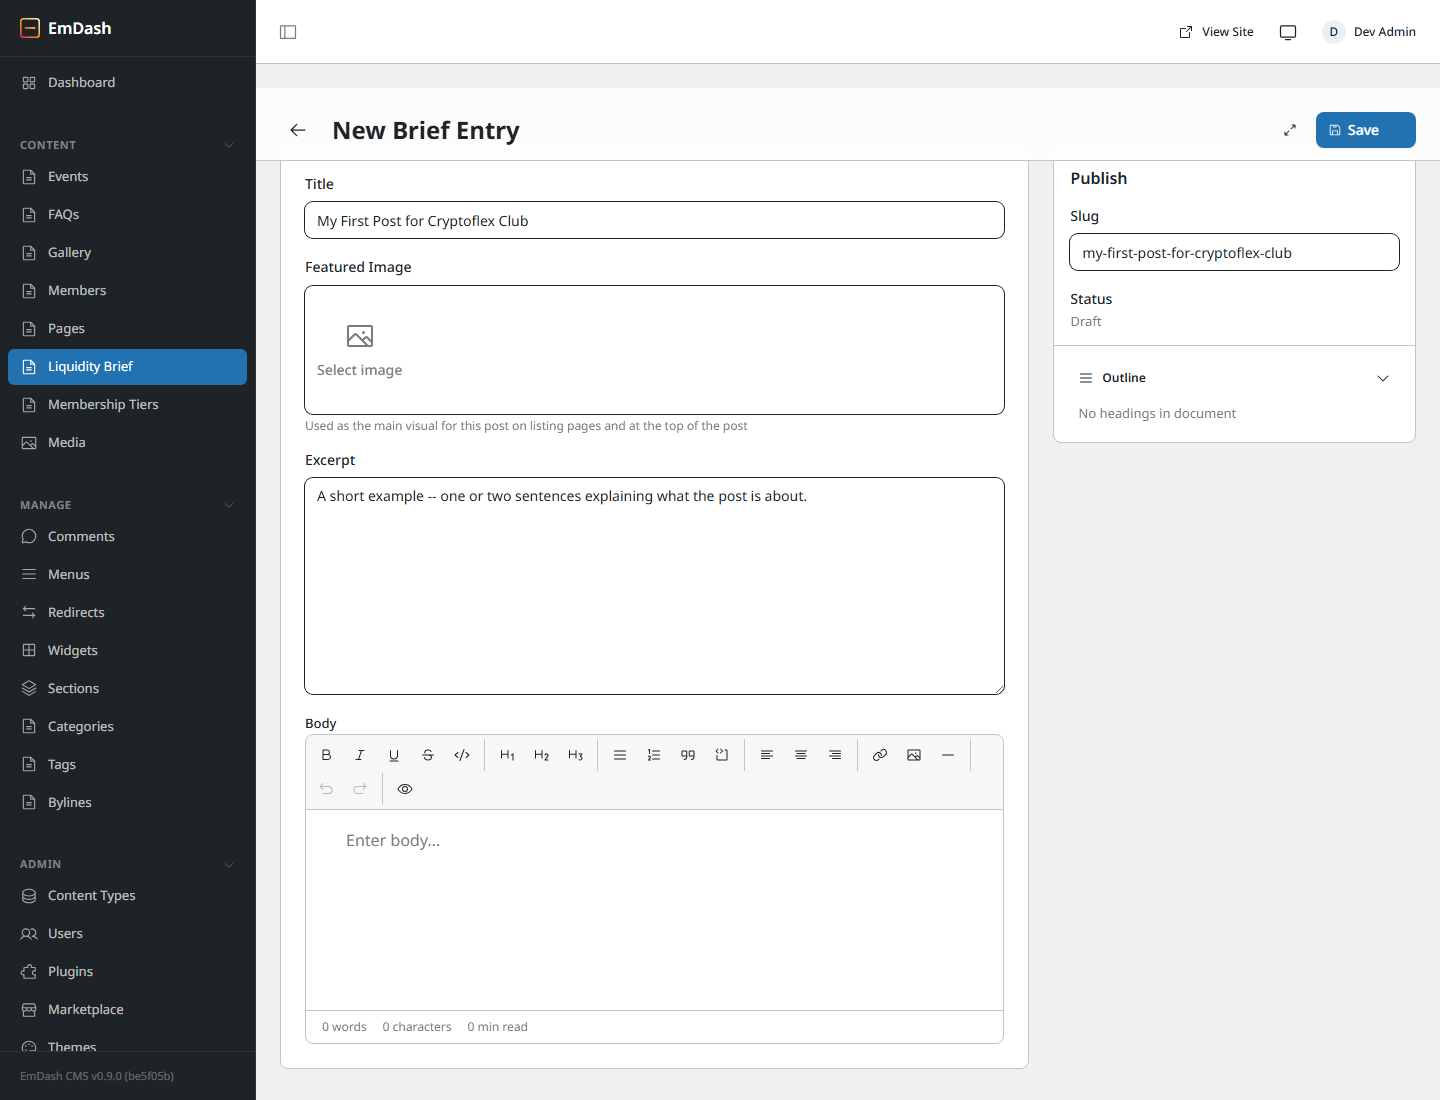
After Save, the URL changes from /posts/new to /posts/<id>. The post is now a draft — saved but not visible on the live site yet. Continue writing; everything autosaves.
-- and it becomes a real em-dash —. ... becomes …. "straight quotes" become "curly quotes". You don't have to think about it.
5. Publishing & unpublishing
Drafts are invisible to the public. To make a post visible:
- Open the post in the editor.
- In the right rail, find the Publish panel.
- Click Publish (it appears where Save was). The status changes from
drafttopublishedand the post goes live atcryptoflex.club/posts/<your-slug>within a minute or two.
To take a post offline again, click Unpublish in the same place. Status returns to draft and the live URL stops working until you publish again.
You can also Schedule a post — pick a future date and time. It stays a draft until that moment, then publishes itself.
To delete a post, click Move to Trash. Trashed posts can be restored from the Trash tab on the list view, or permanently deleted from there.
6. Adding images
Click Media in the sidebar to see every image on the site.

Two ways to add an image to a post:
- Featured Image / OG Image — click the empty box. A picker opens. Either choose an existing image from the library, or click Upload to add a new one. Drag-drop works too.
- Inline image in the body — in the body editor toolbar, click the image icon. Same picker. The image embeds at the cursor position.
7. The other content types
Everything works the same way — list view, click to edit, fill fields, Save, Publish. The fields just match what each thing is.
Members
Member profiles. Name, role, photo, bio, contact links.
Events
Date, time, location, description, RSVP details.
Pages
Static pages like About, Join, Contact. Same editor as posts.
FAQs
Question + answer pairs. Grouped on the FAQ page.
Gallery
Image + caption. Shows on the gallery page.
Membership Tiers
The Bronze / Silver / Gold tiers shown on the Join page.
Categories & Tags
Used to group posts. Add new ones from the post editor's Taxonomies panel.
Bylines
Author profiles for the byline shown on each post.
8. Tips & gotchas
Autosave vs Save
The first time you create something, you have to click Save. After that, every change autosaves. Look at the top-right indicator — Saved means you're up to date.
Slug = URL
The slug is the part of the URL after the section name. A post titled "Five Stages of an Airdrop" becomes /posts/five-stages-of-an-airdrop. Edit it in the right rail if you want a shorter or different URL. If a post is already published, changing the slug breaks the old URL — set up a redirect under Manage → Redirects first.
Preview before publishing
While editing a draft, click Live View in the top-right. It opens the post on the live site so you can read it as a visitor would. (Drafts get a preview link only you can see.)
Revisions = undo, even after Save
Every save creates a revision. Open the Revisions panel in the right rail to see the history and restore an older version. Good safety net for "I accidentally deleted three paragraphs."
Images take a moment to appear on the live site
Cloudflare caches the site aggressively for speed. New posts and image swaps usually show up within a minute or two of publishing, but if something looks stale, do a hard reload (Ctrl+Shift+R or Cmd+Shift+R).
Help, I broke something
Three things, in order:
- Revisions in the right rail — restore the last good version of the post you were editing.
- Trash tab on any list view — restore deleted entries.
- Ask the developer who set up the site. They have access to the database backups and can roll back further if needed.